PvP (Overdrive)
Introduction
As mentioned in the Overdrive article, Overdrive is a "Sphere Style" PvP shard. This means you'll be able to move while casting which creates a fast, fun, and adrenaline fueled form of PvP.
This guide is to give you Overdrive style PvP tutorials, provide current item and spell charts, note skill differences, and other various unique things to Overdrive.
Core Mechanics
In order to be the best Overdrive PvPer you must master spell timings, line of sight, and fizzling.
Spell Timings
Spells take a certain amount of time to channel for them to successfully cast. Understanding these timings is one of the keys to separate yourself from the competition.
The first circle takes a half second to cast and each additional circle takes another half second. So, the first circle takes .5 seconds, the second circle takes 1 second, the third circle takes 1.5 seconds, etc.
There are some exceptions to these rules - EX: fizzling spells (magic arrow, clumsy, feeblemind, and weaken) takes .7 seconds to cast and Greater Heal takes 3 seconds to cast. These are by design for balancing purposes. You can review a full list of spell timings, damage/heal, and mana usage on the Spell Chart below.
Fizzling
Fizzling means you or your opponent's spell does not successfully cast. Your goal while PvPing is for your spells to not fizzle while also making your opponent's spell fizzle. This is achieved through understanding spell timings and using line of sight (explained next) properly.
The primary way you will fizzle your opponent is through fast casting spells called Fizzling Spells. Fizzling Spells include magic arrow, clumsy, feeblemind, and weaken.
More advanced players can use higher level spells to successfully fizzle such as using a 3rd circle spell to fizzle a 7th circle spell.
There is also a small percent chance your spells will fizzle naturally but that depends on the circle of the spell. Higher circle spells have a higher chance of naturally fizzling. Natural fizzling can be mitigated through the use of scrolls.
LOS
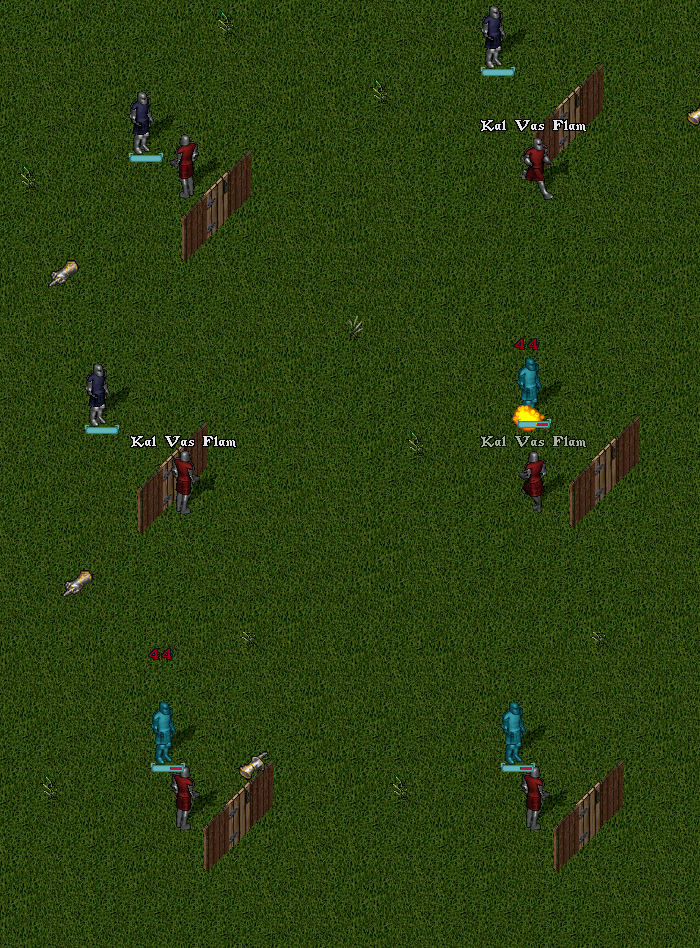
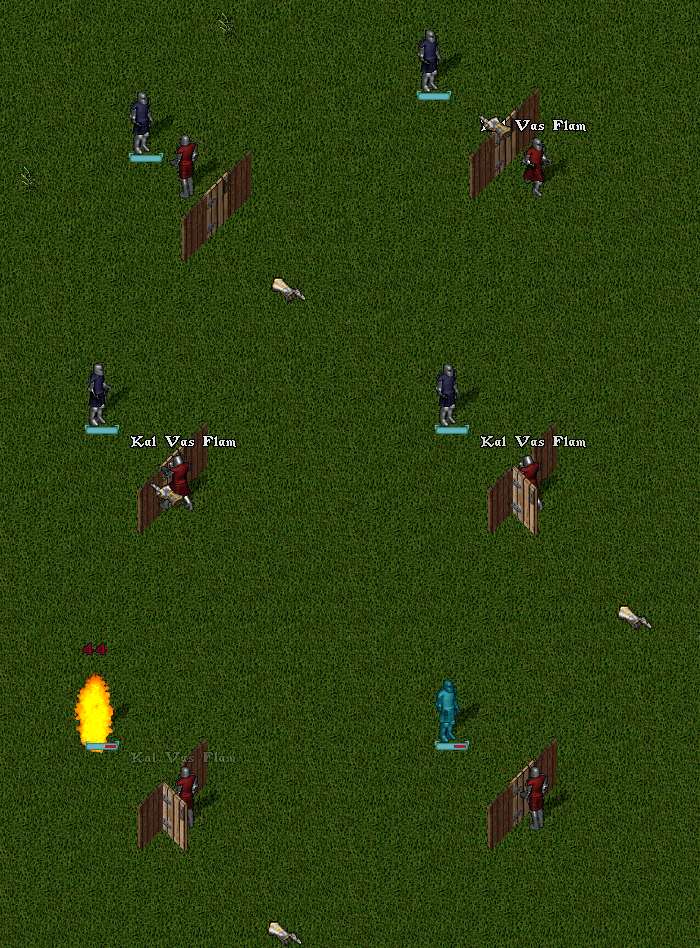
You must have Line of Sight (LOS) of your target in order to successfully cast a spell. Having LOS means there are no objects blocking your view of your opponent. Things such as walls, doors, and trees obstruct your line of sight causing your spell to fizzle. If you're coming from non-Sphere style shards, you'll be surprised to see even objects you can see over (such as furniture or half walls) will block line as sight as well. This is by design. Almost anything you can't run through will obstruct line of sight.
Here is how you properly use LOS: Cast your spell then get out of LOS while its channel. Come into LOS right before it finishes channeling so your target is unable to fizzle you and your spell hits.
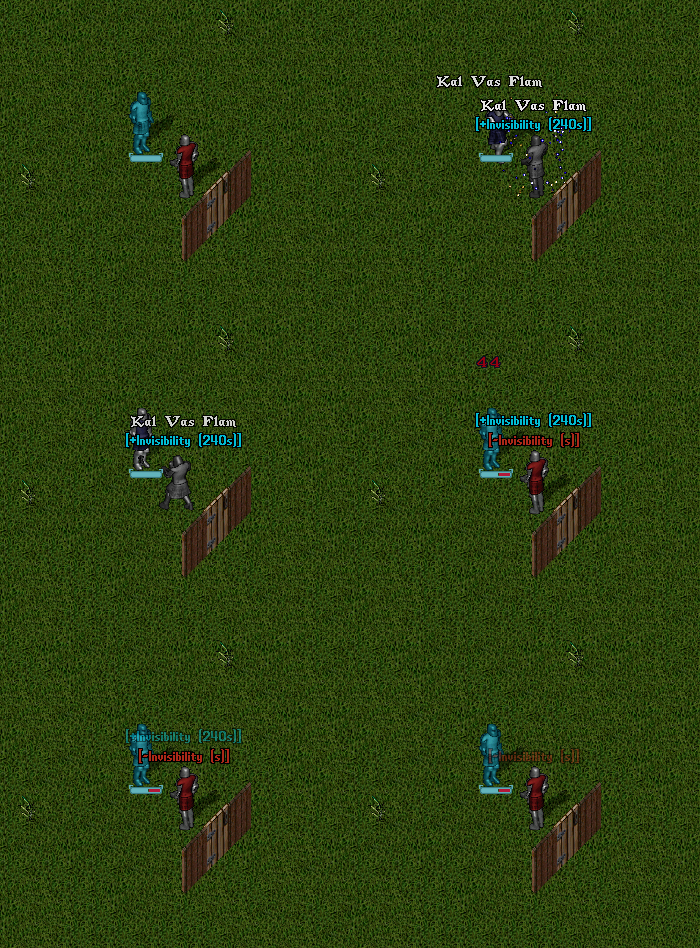
You can also create your own LOS by using doors and items such as invisibility potions
Items
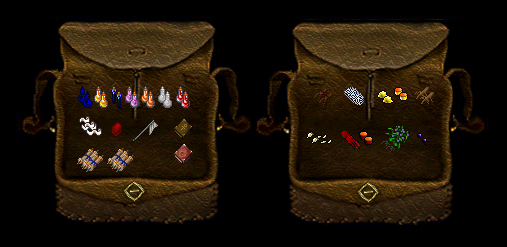
Here are some of the most common items you’ll use while PvPing:
- Spellbook - Required to cast spells
- Reagents - Required to cast spells
- Runebook - Required so you can escape ganks by recalling
- Greater Mana Potions - Recovers Mana
- Greater Heal Potions - Recovers Health
- Invisibility Potions - Instantly makes you invisible. Used for game changing plays.
- Lesser Explosion Potions - Utility item explained in the tips section
- Greater Cure Potions - To cleanse Poison Nova poison
- Greater Restore - Restores HP & Stam (Optional - Could use Greater Refreshment)
- Greater Refreshment - Restores Stam (Optional - Could use Greater Restore)
- Bandages - Provides better healing than Greater Heal but typically used in emergency scenarios when you’re out of mana
- Flamestrike or Thunderclap Scrolls - Used for mana reduction of higher circle spells
- Magic Trap Pouch - Used to escape being paralyzed
- Melee Weapon
Spells
Please note the spell damages below assumes you have GM Evaluating Intelligence and your target has GM Resisting Spells
| Spell | Circle | Dmg/Heal | Buff/Debuff | Duration | Mana | Cast Time | Special Notes |
|---|---|---|---|---|---|---|---|
Clumsy
|
1
|
-20 DEX
|
120
|
10
|
.7
|
||
Create Food
|
1
|
120
|
10
|
.5
|
|||
Feeblemind
|
1
|
-20 INT
|
120
|
10
|
.7
|
||
Heal
|
1
|
8
|
4
|
1.25
|
|||
Magic Arrow
|
1
|
3
|
10
|
.7
|
|||
Night Sight
|
1
|
600
|
4
|
.5
|
|||
Reactive Armor
|
1
|
240
|
4
|
1
|
|||
Weaken
|
1
|
-12 STR
|
10
|
.7
|
|||
Agility
|
2
|
+12 DEX
|
120
|
10
|
1
|
||
Cunning
|
2
|
+12 INT
|
120
|
10
|
1
|
||
Strength
|
2
|
+12
|
120
|
10
|
1
|
||
Cure
|
2
|
6
|
1.3
|
||||
Harm
|
2
|
7
|
6
|
1
|
|||
Magic Trap
|
2
|
10
|
1
|
||||
Magic Untrap
|
2
|
10
|
1
|
||||
Protection
|
2
|
+11 AR
|
120
|
10
|
1.5
|
Can stack with Arch Protection
| |
Bless
|
3
|
+5 ALL STATS
|
120
|
15
|
1.5
|
||
Fireball
|
3
|
12
|
12
|
1.5
|
|||
Magic Lock
|
3
|
9
|
1.5
|
||||
Poison
|
3
|
8
|
10
|
1.5
|
|||
Telekinesis
|
3
|
9
|
1.5
|
||||
Teleport
|
3
|
9
|
1.5
|
You are frozen while channeling
| |||
Unlock
|
3
|
9
|
1.5
|
||||
Wall of Stone
|
4
|
30
|
15
|
2
|
|||
Arch Cure
|
4
|
15
|
2
|
||||
Arch Protection
|
4
|
+11 AR
|
120
|
15
|
2
|
Can stack with Protection
| |
Curse
|
4
|
-12 ALL STATS
|
120
|
15
|
2
|
Cannot stack with other Debuffs
| |
Fire Field
|
4
|
5
|
30
|
11
|
2
|
||
Greater Heal
|
4
|
40
|
20
|
3
|
|||
Lightning
|
4
|
17
|
12
|
2
|
|||
Ice Strike
|
4
|
21
|
13
|
2.25
|
|||
Mana Drain
|
4
|
-25 MANA
|
15
|
2
|
|||
Recall
|
4
|
12
|
4
|
||||
Frost Nova
|
4
|
21
|
12
|
2
|
AOE within 3 tiles
| ||
Poison Nova
|
4
|
12
|
2
|
AOE within 3 tiles. Applies incurable poison unless you use Greater Cure potion.
| |||
Blade Spirit
|
5
|
60
|
14
|
4
|
|||
Dispel Field
|
5
|
14
|
2.5
|
||||
Incognito
|
5
|
120
|
14
|
2.5
|
|||
Magic Reflection
|
5
|
120
|
14
|
2.5
|
|||
Mind Blast
|
5
|
23
|
18
|
2.5
|
|||
Glacial Burst
|
5
|
25
|
18
|
2.5
|
|||
Paralyze
|
5
|
10
|
14
|
2.5
|
|||
Poison Field
|
5
|
30
|
14
|
2.5
|
|||
Summon Creature
|
5
|
400
|
14
|
4
|
|||
Dispel
|
6
|
10
|
3
|
||||
Energy Bolt
|
6
|
30
|
20
|
3
|
|||
Explosion
|
6
|
30
|
20
|
3
|
Spell has a 2.5 second delay for damage
| ||
Invisibility
|
6
|
240
|
20
|
3
|
|||
Mass Curse
|
6
|
-25 ALL STATS
|
60
|
30
|
3
|
Cannot stack with other Debuffs
| |
Paralyze Field
|
6
|
30
|
20
|
3
|
|||
Reveal
|
6
|
15
|
3
|
||||
Magic Echo
|
6
|
30
|
20
|
3
|
|||
Chain Lightning
|
7
|
SEE NOTES
|
40
|
3.5
|
Randomly attacks those around you after being attacked by more than 1 target
| ||
Energy Field
|
7
|
45
|
40
|
3.5
|
|||
Flamestrike
|
7
|
42
|
40
|
3.5
|
|||
Thunderclap
|
7
|
44
|
43
|
3.75
|
|||
Gate Travel
|
7
|
40
|
3.5
|
||||
Mana Vampire
|
7
|
+25 HP
|
-65 MANA
|
30
|
3.5
|
||
Mass Dispel
|
7
|
40
|
3.5
|
||||
Meteor Swarm
|
7
|
SEE NOTES
|
40
|
3.5
|
50 damage split between all within 3 tiles of target
| ||
Polymorph
|
7
|
480
|
40
|
3.5
|
|||
Earthquake
|
8
|
50
|
4
|
50% of hp taken from all targets within 10 tiles of caster
| |||
Energy Vortex
|
8
|
400
|
50
|
4
|
|||
Resurrection
|
8
|
50
|
4
|
||||
Air Elemental
|
8
|
400
|
50
|
4
|
|||
Summon Daemon
|
8
|
400
|
50
|
4
|
|||
Earth Elemental
|
8
|
400
|
50
|
4
|
|||
Fire Elemental
|
8
|
400
|
50
|
4
|
|||
Water Elemental
|
8
|
400
|
50
|
4
|
Armors
Each armor piece provides resistance or weakness to different elements. If you wear at least 6 pieces of the same armor, your weaknesses are reduced by 25%. This 25% reduction is NOT shown below under the FULL SET stat.
Armors listed as FULL SET is for 7 pieces of armor. AR listed is for 7 pieces of armor.
| Armor | Type | BS Requirement | Temp Requirement | Heat Requirement | AR (Full Set) | Fire (Full Set) | Fire (Per Piece) | Cold (Full Set) | Cold (Per Piece) | Electric (Full Set) | Electric (Per Piece) |
|---|---|---|---|---|---|---|---|---|---|---|---|
Iron
|
Ore
|
50
|
0
|
0
|
25
|
0
|
0
|
0
|
0
|
0
|
0
|
Aluminum
|
Ore
|
60
|
0
|
0
|
25
|
9.8
|
1.4
|
0
|
0
|
-9.8
|
-1.4
|
Cobalt
|
Ore
|
60
|
0
|
0
|
28
|
0
|
0
|
9.8
|
1.4
|
-9.8
|
-1.4
|
Nickel
|
Ore
|
62
|
0
|
0
|
28
|
0
|
0
|
-9.8
|
-1.4
|
9.8
|
1.4
|
Bronze
|
Alloy
|
65
|
0
|
0
|
30
|
14
|
2
|
-12.6
|
-1.8
|
0
|
0
|
Copper
|
Ore
|
68
|
0
|
0
|
30
|
0
|
0
|
14
|
2
|
-11.2
|
-1.6
|
Steel
|
Alloy
|
70
|
0
|
0
|
45
|
9.8
|
1.4
|
0
|
0
|
-9.8
|
-1.4
|
Aqua Marine
|
Alloy
|
70
|
0
|
0
|
40
|
9.8
|
1.4
|
9.8
|
1.4
|
-14
|
-2
|
Brass
|
Alloy
|
75
|
0
|
0
|
35
|
-14
|
-2
|
15.4
|
2.2
|
0
|
0
|
Zinc
|
Ore
|
78
|
0
|
0
|
38
|
-12.6
|
-1.8
|
0
|
0
|
15.4
|
2.2
|
Cupronickel
|
Alloy
|
80
|
0
|
0
|
38
|
0
|
0
|
15.4
|
2.2
|
-12.6
|
-1.8
|
Moonstone
|
Alloy
|
85
|
0
|
0
|
40
|
-14
|
-2
|
9.8
|
1.4
|
9.8
|
1.4
|
Silver
|
Ore
|
85
|
0
|
0
|
30
|
0
|
0
|
18.2
|
2.6
|
-11.2
|
-1.6
|
Tin
|
Ore
|
90
|
0
|
0
|
85
|
0
|
0
|
0
|
0
|
-9.8
|
-1.4
|
Velvet
|
Alloy
|
90
|
0
|
0
|
50
|
19.6
|
2.8
|
-15.4
|
-2.2
|
0
|
0
|
Gold
|
Ore
|
92
|
0
|
0
|
55
|
19.6
|
2.8
|
0
|
0
|
-15.4
|
-2.2
|
Lava Rock
|
Alloy
|
92
|
0
|
0
|
60
|
30.8
|
4.4
|
-25.2
|
-3.6
|
0
|
0
|
Carbon
|
Ore
|
92
|
0
|
0
|
95
|
0
|
0
|
0
|
0
|
0
|
0
|
Shakudo
|
Alloy
|
95
|
0
|
0
|
60
|
30.8
|
4.4
|
0
|
0
|
-25.2
|
-3.6
|
Zirconium
|
Ore
|
95
|
0
|
0
|
10
|
28
|
4
|
-14
|
-2
|
-28
|
-4
|
Lead
|
Ore
|
98
|
0
|
0
|
70
|
-19.6
|
-2.8
|
9.8
|
1.4
|
19.6
|
2.8
|
Mercury
|
Ore
|
98
|
0
|
0
|
70
|
19.6
|
2.8
|
-19.6
|
-2.8
|
9.8
|
1.4
|
Opiate
|
Alloy
|
98
|
0
|
0
|
30
|
50.4
|
7.2
|
50.4
|
7.2
|
-29.4
|
-4.2
|
Beryllium
|
Ore
|
100
|
0
|
0
|
80
|
-19.6
|
-2.8
|
25.2
|
3.6
|
15.4
|
2.2
|
Delta
|
Alloy
|
100
|
0
|
0
|
90
|
0
|
0
|
39.2
|
5.6
|
-9.6
|
-2.8
|
Phosphorus
|
Ore
|
102
|
0
|
0
|
90
|
5.6
|
.8
|
5.6
|
.8
|
5.6
|
.8
|
Platinum
|
Ore
|
102
|
0
|
0
|
100
|
40.6
|
5.8
|
-9.8
|
-1.4
|
-5.6
|
-.8
|
Carbon Polymer
|
Alloy
|
105
|
0
|
0
|
110
|
7
|
1
|
7
|
1
|
7
|
1
|
Chromium
|
Ore
|
105
|
0
|
0
|
115
|
40.6
|
5.8
|
-5.6
|
-.8
|
-5.6
|
-.8
|
Manganese
|
Ore
|
108
|
0
|
0
|
120
|
40.6
|
5.8
|
-9.8
|
-1.4
|
0
|
0
|
Fiber Glass
|
Alloy
|
110
|
0
|
0
|
130
|
-9.8
|
-1.4
|
0
|
0
|
42
|
6
|
Titanium
|
Ore
|
112
|
0
|
0
|
300
|
-19.6
|
-2.8
|
-19.6
|
-2.8
|
-19.6
|
-2.8
|
Dragonite
|
Alloy
|
115
|
0
|
0
|
400
|
-9.8
|
-1.4
|
-9.8
|
-1.4
|
-9.8
|
-1.4
|
Tungsten
|
Ore
|
118
|
0
|
0
|
0
|
50.4
|
7.2
|
50.4
|
7.2
|
0
|
0
|
Silicon
|
Ore
|
120
|
0
|
0
|
0
|
0
|
0
|
50.4
|
7.2
|
50.4
|
7.2
|
Kryptonite
|
Ore
|
122
|
0
|
0
|
150
|
-8.4
|
-1.2
|
-8.4
|
-1.2
|
70
|
10
|
Ragnarok
|
Alloy
|
125
|
0
|
0
|
125
|
19.6
|
2.8
|
19.6
|
2.8
|
19.6
|
2.8
|
Plutonium
|
Ore
|
130
|
0
|
0
|
160
|
0
|
0
|
40.6
|
5.8
|
19.6
|
2.8
|
Uranium
|
Ore
|
130
|
0
|
0
|
175
|
40.6
|
5.8
|
0
|
0
|
19.6
|
2.8
|
Atomic
|
Alloy
|
135
|
0
|
0
|
200
|
30.8
|
4.4
|
29.4
|
4.2
|
29.4
|
4.2
|
Potions
| Item | Heal/Dmg | Buff/Debuff | Notes |
|---|---|---|---|
Agility
|
+10 DEX
|
||
Greater Agility
|
+15 DEX
|
||
Strength
|
+10 STR
|
||
Greater Strength
|
+15 STR
|
||
Lesser Heal
|
10
|
||
Heal
|
20
|
||
Greater Heal
|
35
|
||
Mana
|
45
|
||
Greater Mana
|
75
|
||
Lesser Explosion
|
5
|
||
Explosion
|
10
|
||
Greater Explosion
|
15
|
||
Restore
|
25
|
Restores HP & DEX
| |
Greater Restore
|
40
|
Restores HP & DEX
| |
Refreshment
|
50
|
||
Greater Refreshment
|
100
|
Macros
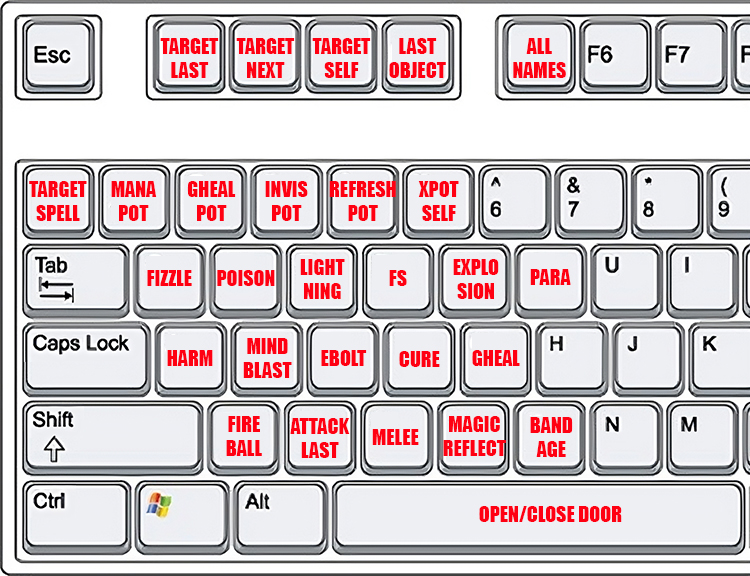
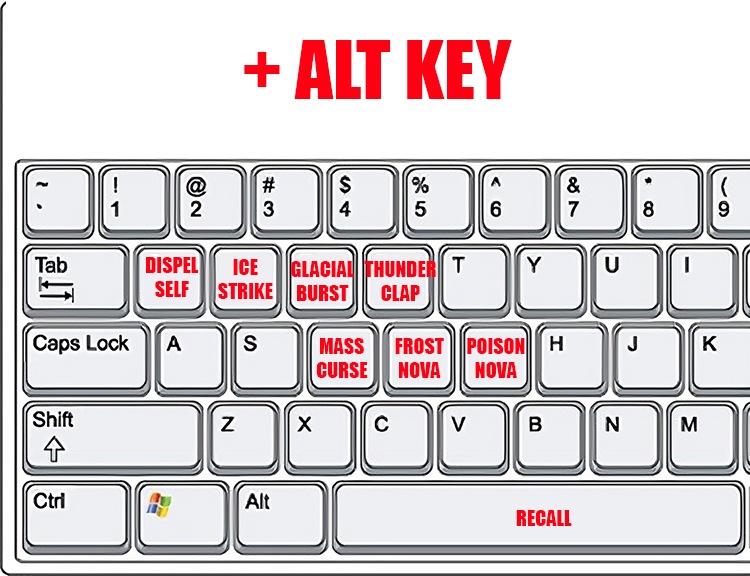
If you are new to Overdrive's PvP style, we recommend you use the following Hot Key set up.
Melee
It can be a rough world out there for Melee lovers on Overdrive. There is almost zero chance you’ll kill someone with Melee only in open world combat if you’re fighting someone decent because Magery is so powerful. With that said, Melee can be an extremely useful tool in PvP if you know how to use it right but let’s go over the mechanics:
Accuracy
Melee accuracy rates are extremely high @ a 75% hit rate at GM Combat Skill
Wind Up Mechanic
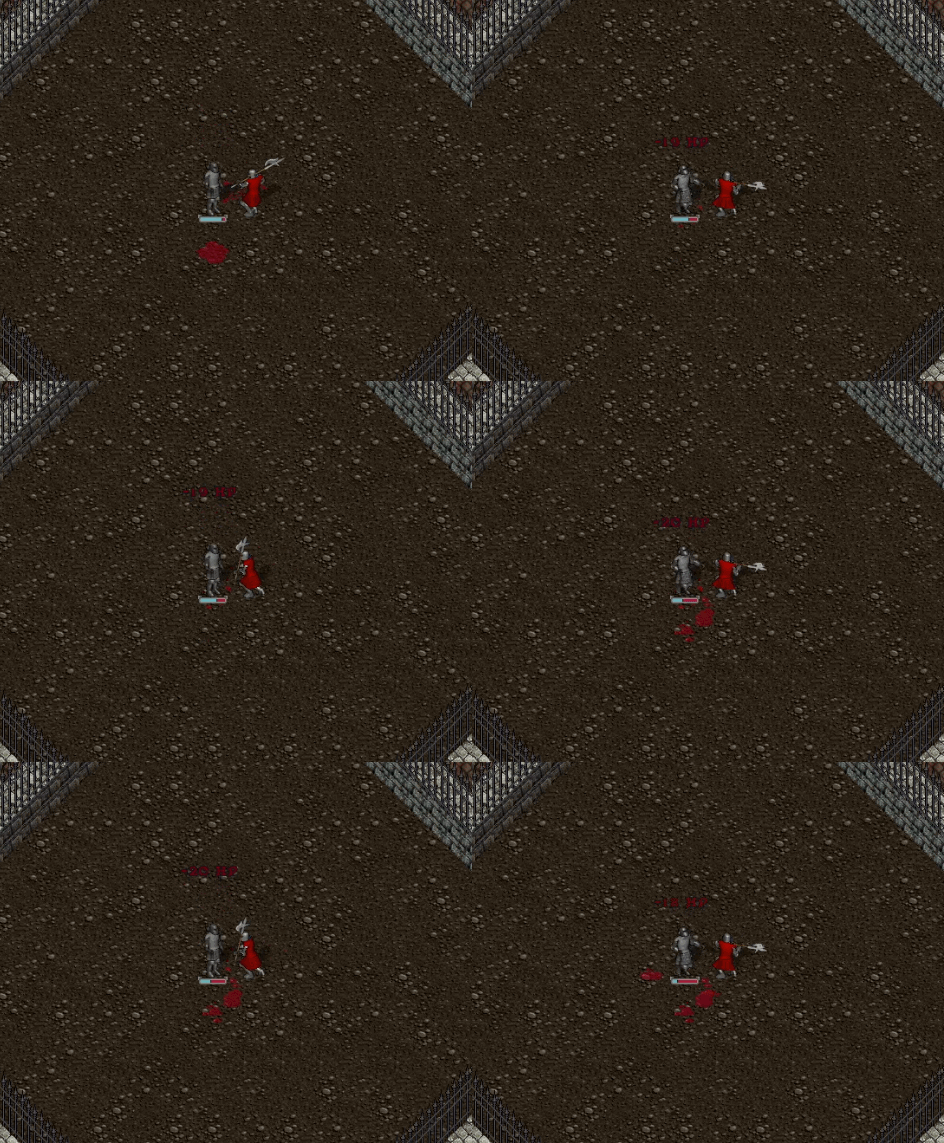
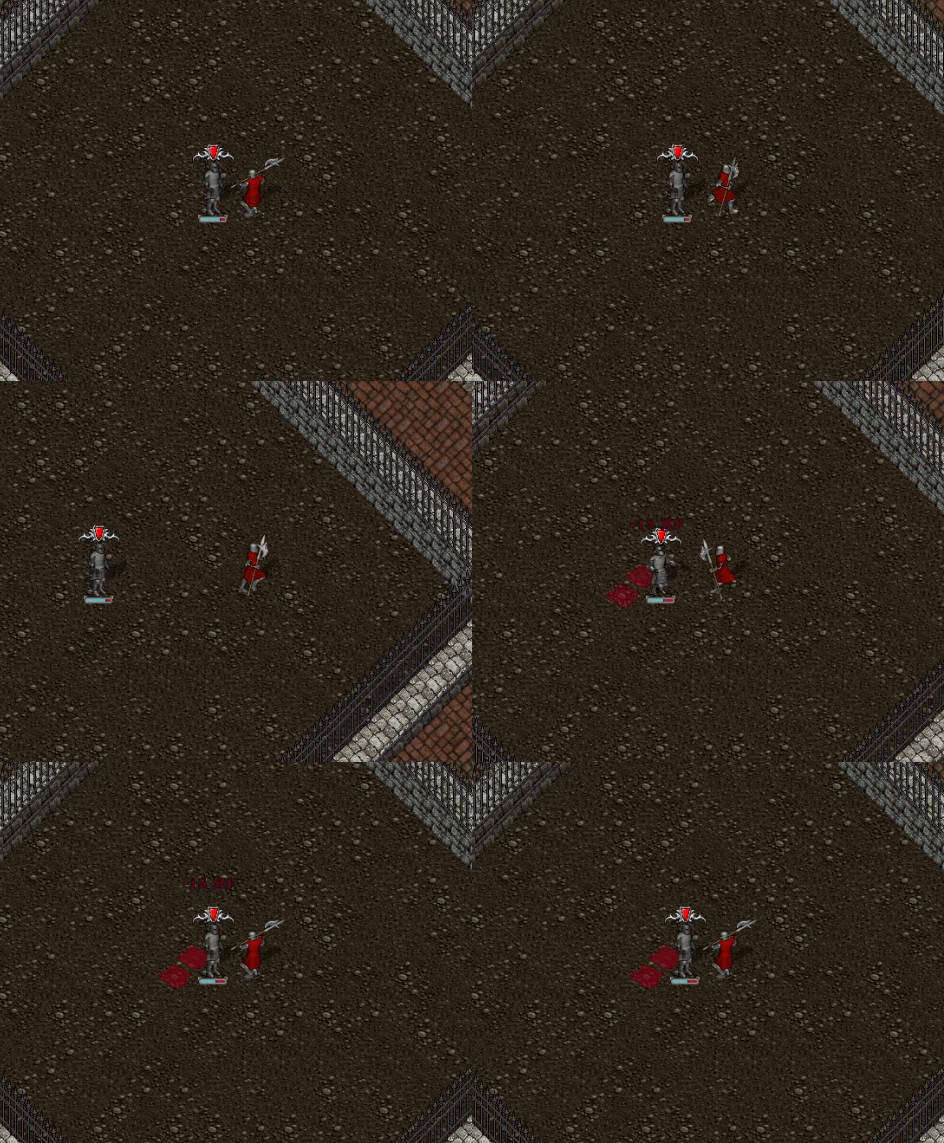
Overdrive's melee ruleset is set to a wind up style mechanic. Once you’re within attack range (1-2 tiles depending on the weapon), you initiate the swing animation and you attempt a hit after the weapon’s delay.
However, if you initiate the swing animation then immediately run out of Melee range, you “load” this swing. Once a swing is loaded, it will instantly hit your target when you return within attack range - even through walls.
Special Moves
Refer to the Special Moves article. Note that stun punch has been disabled for Overdrive.
How To Properly Use Melee
Now that we understand the mechanics let’s talk about how Melee is used:
The obvious best situation is if you’ve trapped someone in a small area, such as a house, where it’s hard to create space to successfully cast spells. If someone runs into a small space I'm immediately equipping my Axe and going to town.
Normally, you’re fighting in large open spaces so you have to be far more careful when planning a Melee strike. In these situations you run to your target to load up your swing, get out of LOS so the spell being cast on you fizzles, then you immediately go back in for a hit.
It’s very high risk and high reward as you can chunk people pretty hard with Melee. But you have to be super confident in your ability to LOS to make it work well.
The third situation is when you’re completely out of mana and your potions are on cooldown. It's basically a last resort. In these situations it's not really about getting damage off, moreso for fizzling so you buy time for your potion to come off cooldown. Some players carry fast swinging weapons like daggers for these situations.
Archery follows the same "wait" mechanics as Melee but it is not typically worth using in PvP (from an optimization standpoint) because Magery is so powerful since you can do more damage while moving. Additionally, sitting still while fighting a Mage is a huge vulnerability which any decent PvPer will fully take advantage of. It's not impossible to use Archery well in PvP but you need to be very experienced and know the proper times to use it.
Tips
- Practice spell timings over and over again until you gain an intuitive feel for when they will hit. This intuition will come with time but practicing initially will get you a headstart.
- You can cast magic arrow on an explosion potion for a variety of strategic reasons:
- Escape being paralyzed
- AOE damage cause your target to fizzle or finishing them off
- Reveal hidden targets
- Get in the habit of curing instantly once poisoned. Ideally, you would be able to cure yourself and still fizzle your opponent if they have casted a 5th circle or above spell.
- Practice using doors as much as possible. They’re a great way to create LOS for yourself and can be used strategically in a number of ways.
- Forego using fizzling spells when you could fizzle your opponent using a higher level spell (EX: using poison to fizzle flamestrike).
- Combo Explosion + Energy Bolt or Flamestrike to do devastating chunk damage.
- Use magic arrow as your primary fizzle spell but use weaken, clumsy, or feeblemind to initially debuff your opponent.


